Raspberry Pi Digital Signage Hardware List: What to Buy
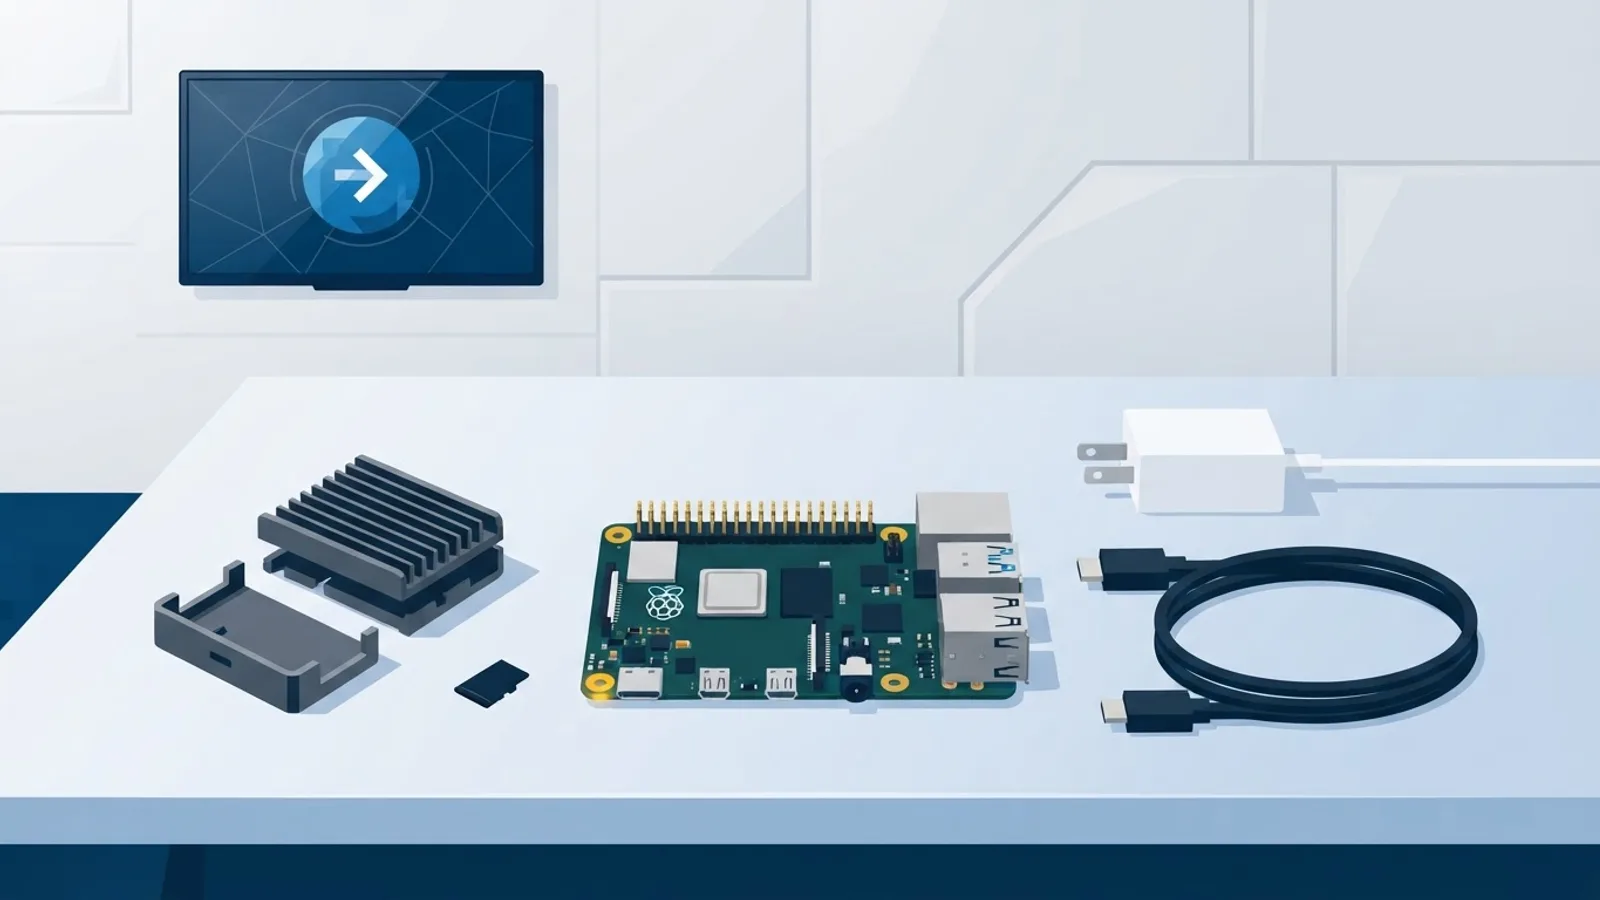
If you're putting together a raspberry pi digital signage hardware list, the good news is that the parts are cheap, widely available, and mostly the same five items whether you're running one screen in a break room or twenty across a chain of stores. The software side already has its own walkthroughs: the installer, kiosk mode, and autostart are covered in the complete Raspberry Pi signage guide. This is the shopping list, with the reasoning behind each item so you don't waste money or end up with random reboots six weeks in.
What Raspberry Pi do I need for digital signage?
Any Raspberry Pi running Raspberry Pi OS with a desktop can technically drive a screen. A Pi Zero 2 W will show a static image. A Pi 3B+ will play a slow slideshow. But if you want smooth video, animated transitions, or a web-based dashboard that scrolls or refreshes, you need a Raspberry Pi 4 or Raspberry Pi 5. It comes down to hardware: older boards use a slower GPU and lower memory bandwidth, and it shows the moment a playlist includes an MP4 or a live widget.
Between the 4 and the 5, the choice mostly comes down to price and what you already have. The Pi 5 is faster and runs cooler under sustained load, but it also needs a beefier power supply. If you want the full breakdown of which one to buy for signage specifically, the Raspberry Pi digital signage guide covers the Pi 4 vs Pi 5 tradeoffs in detail rather than repeating it here. For a single-screen build, a 4GB RAM model is enough; go to 8GB only if you're running something unusually memory-hungry alongside the player.
MicroSD card: size and speed
The SD card is where most cheap builds quietly fail. Raspberry Pi OS itself takes a few gigabytes, and your media library (images, video loops, cached web assets) needs room on top of that. For a raspberry pi sd card for signage, buy at least 32GB, and go to 64GB if you're storing a lot of video. Card speed matters more than most people expect: look for A2 or at minimum A1 application-class rating and a U3 speed class. A generic no-name card can work for months and then start throwing read errors, which on a signage box means a frozen or black screen with no warning.
A few practical notes:
- Buy from a reputable brand (SanDisk, Samsung, Kingston) rather than the cheapest listing on a marketplace. Counterfeit cards that under-report their real capacity are common enough to be worth avoiding entirely.
- Card wear is real on a device that runs 24/7. If you're deploying more than a handful of screens, keep a couple of spare cards pre-imaged so a card failure is a five-minute swap, not a truck roll.
- microSD is fine for signage. You don't need a USB SSD boot drive unless you're doing something far heavier than playing a looping playlist.
Power supply: why the official one matters
This is the single most common cause of "my Pi randomly reboots" complaints, and it's almost always the power supply. The Pi 4 needs a genuine 5V/3A USB-C supply; the Pi 5 needs 5V/5A (ideally the official 27W USB-C supply, which also enables faster boot and better sustained performance under load). A phone charger or a cheap third-party adapter that's technically rated correctly but delivers unstable voltage under load will cause the classic yellow lightning bolt icon, silent throttling, or a full reboot at the worst possible moment, like during a lunch rush on a menu board.
For a raspberry pi power supply digital signage build that runs unattended, don't improvise here. Buy the official supply or a supply from a brand that explicitly states Raspberry Pi compatibility and lists the actual current rating, not just the connector type. It's an $8 to $12 part, cheap enough that skimping on it makes no sense given what a random reboot costs you in downtime.
Case and passive cooling for 24/7 use
A signage Pi runs continuously, often behind a TV where airflow is poor and ambient heat from the screen adds a few extra degrees. A bare board will run, but sustained high temperatures on a Pi 4 or 5 trigger thermal throttling, which shows up as dropped frames or stutter in video playback exactly when you'd notice it most.
The fix is cheap: a case with a built-in heatsink or passive metal enclosure. You don't need active cooling (a fan) for typical signage loads, a passive aluminum case is usually enough to keep temperatures in a reasonable range for continuous 1080p or 4K playback. Skip cases that fully enclose the board in plastic with no heatsink contact, they look tidy but trap heat.
HDMI cable and adapter gotchas
Both the Pi 4 and Pi 5 use micro-HDMI ports, not full-size HDMI. This trips up more people than it should: you either need a micro-HDMI to HDMI cable directly, or a micro-HDMI to full-HDMI adapter plus a standard cable you already own. Buy the cable, not the adapter-plus-cable combo, if you can, it's one less loose connector behind the TV to work itself loose over time.
A couple of other things worth checking before you mount anything:
- If the Pi is going behind a large TV, measure the cable run first. A 1 to 2 meter cable is usually enough; anything much longer on cheap cable stock can cause flickering or dropouts at higher resolutions.
- If you're running 4K, confirm the cable is rated for it. A basic HDMI 1.4 cable will often work fine at 1080p but struggle at 4K60.
- Both Pi 4 and Pi 5 have two micro-HDMI ports if you ever want dual displays, but for a single signage screen you'll only use one.
Optional extras: PoE and mounting
Two add-ons are genuinely useful depending on your install:
PoE HAT: if the screen location has an Ethernet run but no nearby power outlet (common in hallways, lobbies, or ceiling-mounted screens), a Power-over-Ethernet HAT lets one cable carry both data and power. It adds cost and a bit of case complexity, but it removes a power brick and cable from the visible install.
VESA/wall mount for the TV: separate from the Pi itself, but worth budgeting for if the screen isn't already mounted. A basic fixed or tilting VESA mount is inexpensive and makes the whole install look intentional instead of a TV propped on a shelf with a Pi taped to the back.
The complete raspberry pi digital signage hardware list
Here's a realistic raspberry pi signage parts list with approximate street prices in USD. Actual prices vary by region and retailer, so treat this as a planning range, not a quote.
| Part | Approx. cost |
|---|---|
| Raspberry Pi 4 or 5 (4GB) | $55 to $80 |
| MicroSD card, 32 to 64GB, A2/U3 | $8 to $14 |
| Official power supply (USB-C) | $8 to $12 |
| Case with passive heatsink | $8 to $15 |
| Micro-HDMI to HDMI cable | $6 to $10 |
| PoE HAT (optional) | $20 to $25 |
| VESA wall mount (optional) | $10 to $25 |
Core build (Pi, card, power, case, cable): roughly $85 to $130. Add PoE and a wall mount and you're closer to $115 to $180 per screen. That's the hardware cost before any software or subscription, and it's a one-time spend, the Pi itself doesn't wear out from normal signage use the way a card can.
When TVpilot is, and isn't, the right fit
Once the hardware is assembled, you still need something to actually manage what plays on the screen, update content remotely, and recover if the Pi loses power or network for a while. TVpilot is built for exactly this: a hosted dashboard that pushes playlists, schedules, and widgets to a Pi player, with a one-command installer and a watchdog that restarts the player automatically if it crashes. The dashboard generates that installer with a short claim code, and the setup itself is covered separately in the kiosk mode walkthrough.
It's a poor fit if you specifically want a self-hosted, open-source stack you run on your own server. TVpilot is hosted SaaS. You don't install it on your own server or run it as software you own outright. If that matters more to you than convenience, it's worth reading up on self-hosted alternatives before you commit either way. For most small businesses and offices that just want a screen to keep working without someone SSHing into a Pi every time it hangs, the managed route saves more time than it costs.
Buy the parts, then handle software in ten minutes
Get the five core items (Pi 4 or 5, a decent card, the official power supply, a cooled case, and the right HDMI cable) and you've covered every common failure point before you've written a line of config. Once it's assembled and booted into Raspberry Pi OS, sign up for a free TVpilot account and run the one-command installer from your dashboard to turn that board into a managed screen in minutes.
Frequently asked questions
What Raspberry Pi do I need for digital signage?
Any Pi running Raspberry Pi OS with a desktop will technically boot into a signage player, but a Pi 3B+ or older shows lag on video and web widgets. A Raspberry Pi 4 or Raspberry Pi 5 with 4GB RAM is the practical minimum for smooth 1080p or 4K playback and animated transitions.
Can I use a Raspberry Pi Zero for signage?
You can boot Raspberry Pi OS on a Pi Zero 2 W and display a static image, but its GPU and memory bandwidth aren't enough for smooth video, web dashboards, or transitions. For anything beyond a still image, budget for a Pi 4 or 5 instead.
Do I need the official Raspberry Pi power supply?
Yes, or an equivalent from a brand that explicitly states the correct wattage for your Pi model (5V/3A for the Pi 4, 5V/5A for the Pi 5). Underpowered or unstable third-party adapters are the most common cause of unexplained reboots and throttling on signage builds that run unattended.
How much does a Raspberry Pi signage setup cost in total?
A core build with a Pi 4 or 5, microSD card, official power supply, cooled case, and HDMI cable runs roughly $85 to $130. Adding a PoE HAT and a VESA wall mount brings a typical per-screen cost to about $115 to $180, before any signage software subscription.