Digital Signage System Architecture Explained (2026)
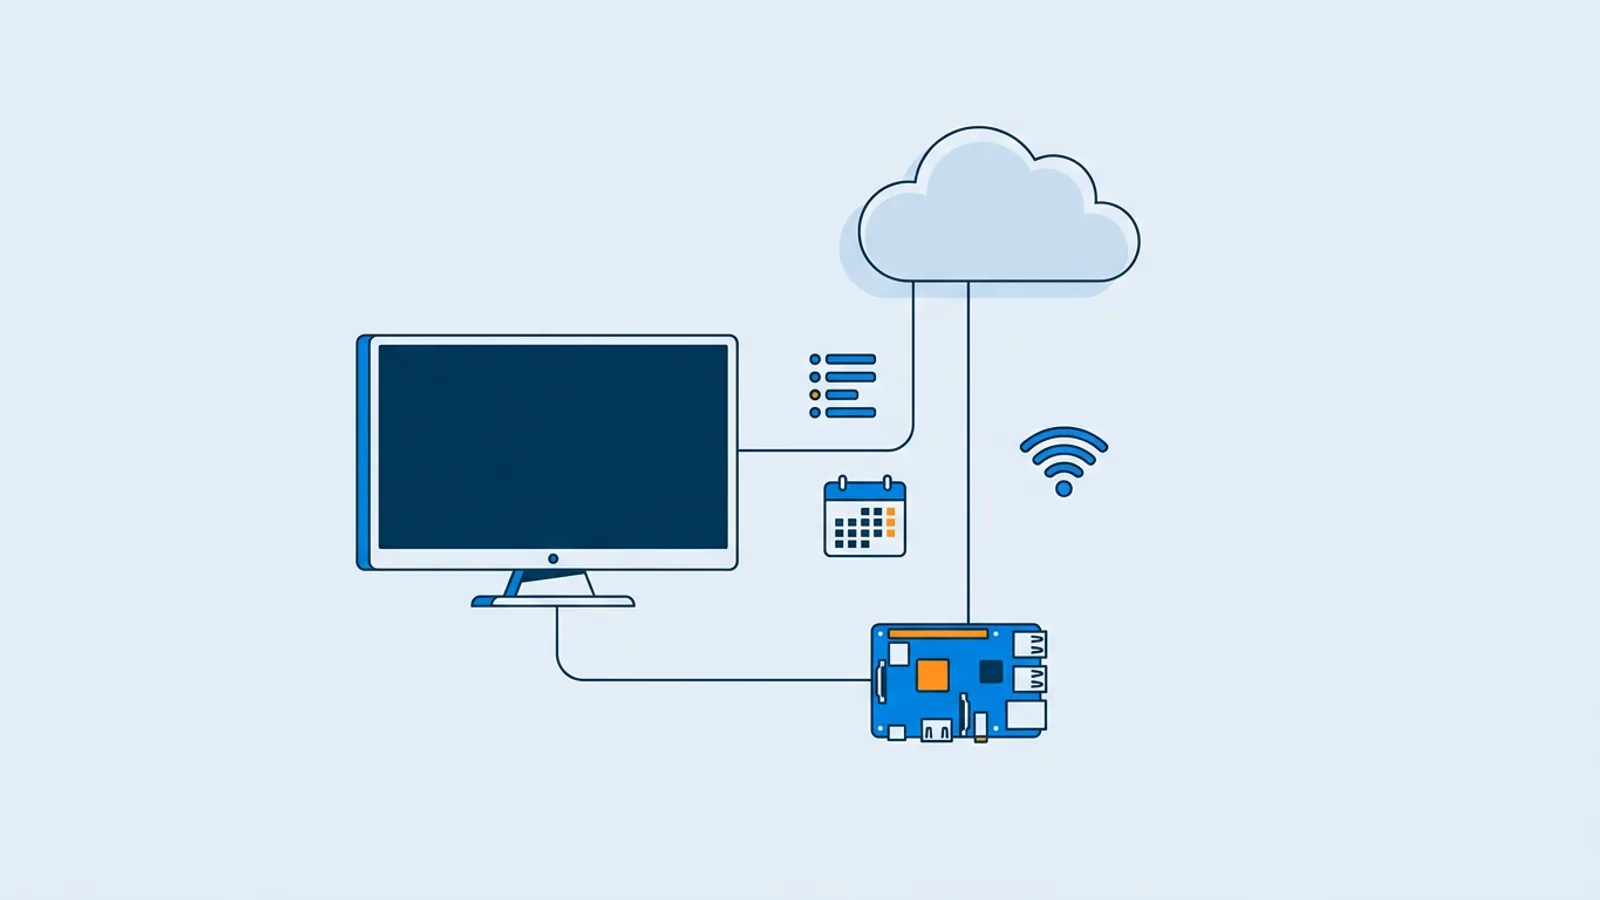
If you've ever wondered how digital signage works under the hood, the short answer is: a small computer plays content, a cloud dashboard tells it what to play and when, and a network connection keeps the two in sync. That's the whole digital signage system architecture in one sentence. Everything else in this guide fills in the details so you can build or buy the right setup instead of guessing.
Most confusion around digital signage comes from mixing up the layers. A TV is not a signage system. A media player is not a CMS. A playlist is not a schedule. Once you separate these pieces, choosing hardware and software gets a lot easier, whether you're mounting one screen in a lobby or running a chain of menu boards. If you want a hands-on starting point rather than theory, the Raspberry Pi signage setup is a good example of how these layers come together on cheap, widely available hardware.
The four layers of a digital signage system architecture
Every signage deployment, no matter the brand or price, breaks down into four layers:
- Display: the screen itself (a TV, monitor, or purpose-built panel).
- Player: the hardware and software that renders content and pushes pixels to the display.
- Content management system (CMS): where you upload media, build playlists, and set schedules.
- Network and delivery: how content and commands travel between the CMS and the player.
A cheap smart TV app, a Raspberry Pi with a kiosk browser, and an enterprise media player box all fill the same four roles. They just do it with different hardware, different reliability, and different price tags.
Display
The display is the least interesting layer technically, but it drives a lot of practical decisions: portrait or landscape orientation, viewing distance, ambient light, and whether HDMI-CEC works for power control. Most consumer and commercial TVs support CEC, which lets a connected player switch the screen on and off without a smart plug. That's a small detail, but it saves a lot of manual effort in retail and office deployments that don't run 24/7.
Player
The player is the layer people usually mean when they say "digital signage player." It's the device that actually renders your playlist: a Raspberry Pi, an Android TV box, a Fire TV Stick, an old laptop, or a built-in smart TV app. Under the hood, most modern players are running a full-screen browser in kiosk mode, showing a web page that the CMS controls remotely. That's true whether the box costs $35 or $350.
The player's job is narrow but critical: boot reliably, connect to the network, pull the current playlist and schedule, render it without crashing, and recover on its own if something goes wrong (power cut, Wi-Fi drop, app crash). A player that needs someone to walk over and unplug it once a week isn't really "managed" signage, it's a computer someone has to babysit.
Content management system
The CMS is the dashboard layer: where you upload images, videos, PDFs and web pages, arrange them into playlists, set day-of-week and time-slot schedules, and check whether each screen is online. A good digital signage CMS also handles things the player shouldn't have to think about, like remote updates, screen monitoring, and content design tools. This is the layer that turns a pile of hardware into something a non-technical staff member can actually run day to day.
Network and delivery
This layer is often invisible until it breaks. It covers how the player authenticates with the CMS, how often it checks for new content, what happens during an internet outage, and how updates get pushed to devices in the field. Cloud-hosted signage platforms handle this centrally; fully offline or self-hosted setups put more of this responsibility on you.
A concrete example: how the layers connect on a Raspberry Pi
Here's what the architecture looks like in practice on one of the most common DIY setups, a Raspberry Pi running as a signage player:
- You create a screen in the CMS dashboard and get a short claim code.
- On the Pi, you run a one-line installer script that sets up Chromium in kiosk mode, configures auto-start via a systemd service, and registers the device using that claim code.
- The CMS pushes down the current playlist and schedule; the Pi's browser renders it full-screen with no cursor, no browser chrome, no distractions.
- A watchdog process on the Pi checks that the kiosk browser is alive and restarts it within seconds if it crashes or the display drops.
- Once a day, the player checks for software updates on its own; you can also trigger a remote update or reboot from the dashboard if needed.
- If the TV supports HDMI-CEC, the player checks the power schedule every minute and switches the screen on or into standby automatically, no smart plug required.
That sequence is the entire digital signage system architecture, condensed into one device. TVpilot.App implements this exact flow for Raspberry Pi (the Raspberry Pi page has the installer command and hardware notes), and the same CMS works with Fire TV Stick, Android TV, and browser-based smart TVs, since they all just need a URL and a modern browser to render the player.
Comparing player types by architecture role
| Player type | Player software | Typical use | Notes |
|---|---|---|---|
| Raspberry Pi | Chromium kiosk + systemd watchdog | General purpose, menu boards, lobbies | Best balance of cost, control, and reliability; Pi 4 or 5 recommended for video |
| Fire TV Stick | Browser app in kiosk mode | Budget retrofits on existing TVs | No dedicated native app; runs through the browser route |
| Android TV | Browser app in kiosk mode | Retail, office displays | Same browser-based approach as Fire TV |
| Smart TV browser | Built-in TV browser | Simplest possible setup | Depends on the TV's built-in browser quality and update support |
| Old laptop | Full browser, manually locked down | Temporary or spare-hardware setups | Works, but higher power draw and less reliable auto-recovery |
If you're deciding between these, the Raspberry Pi signage guide and the Fire TV Stick kiosk mode post go deeper on setup steps for each.
Self-hosted vs hosted CMS: the architecture tradeoff
The layers above stay the same whether you self-host the CMS or use a hosted service, but who's responsible for each layer changes. With a self-hosted open-source signage server, you're running the CMS on your own infrastructure: patching it, backing it up, securing remote access, and troubleshooting network issues yourself. That's a real option and can be the right call for people who want full control or have specific compliance needs. The open-source digital signage cost breakdown covers what that actually costs in time, not just money.
A hosted CMS like TVpilot moves the CMS and delivery layers to someone else's servers. You still own the display and player hardware, but you're not maintaining a server, applying security patches, or building your own update pipeline. The tradeoff is straightforward: less to maintain, but you're not self-hostable and you depend on an internet connection for content updates (a Pi player will recover automatically once connectivity returns, but it can't fetch new content while offline).
When TVpilot fits this architecture, and when it doesn't
TVpilot fills the CMS and delivery layers, and works with the Raspberry Pi player setup described above, plus Fire TV Stick, Android TV, and browser-based smart TVs. The free plan covers one screen with 500 MB of storage, no credit card needed, which is enough to test the whole architecture before paying anything. Paid plans (Starter at €5/month for 5 screens, Pro at €19/month for 25 screens) add more storage and screens without changing how the underlying system works.
It's a good fit if you want the CMS and player-management layers handled for you, want AI Studio to generate designed screens from a short brief, or need weather and real-estate feed widgets without building them yourself. It's not the right fit if you specifically need a self-hosted, open-source CMS you control end-to-end, or a dedicated native Android TV/Fire TV app rather than the browser route.
Getting started with a working architecture
The fastest way to see this architecture running is to pick one screen, follow the Raspberry Pi setup or point a browser-based device at a player URL, and build one playlist with a schedule. Once that single screen works reliably, adding more is just repeating the same player-side steps against the same CMS. Sign up to try it on the free plan before deciding whether to scale it across more screens.
Frequently asked questions
What is digital signage system architecture?
It's the set of four layers that make up any digital signage deployment: the display (the screen), the player (hardware and software that renders content), the content management system or CMS (where you build playlists and schedules), and the network layer that connects the player to the CMS for updates and monitoring. Every signage setup, from a single Raspberry Pi to a chain-wide rollout, uses this same structure.
How does digital signage actually work day to day?
You upload media and build a playlist and schedule in a CMS dashboard. The player device, often a small computer running a full-screen browser, checks in with the CMS regularly, downloads the current playlist, and renders it on the connected screen. If the player supports it, it can also power the TV on and off automatically and recover on its own after crashes or outages.
Do I need a dedicated media player box, or can I use a browser?
A dedicated player like a Raspberry Pi gives you more reliability features: auto-start on boot, a watchdog that restarts a crashed player within seconds, and scheduled power control via HDMI-CEC. But any device with a modern browser, including smart TVs, Android TV boxes, and Fire TV Sticks, can act as a player by pointing it at a player URL, since most signage players are really just a browser in kiosk mode.
What's the difference between a digital signage player and a digital signage CMS?
The player is the device and software that renders content on the screen. The CMS is the dashboard where you manage that content: uploading media, arranging playlists, setting schedules, and monitoring whether screens are online. One CMS can control many players of different hardware types at once, since each player just needs to know how to talk to that CMS.